Creating Plugin Modules
Introduction
There are two types of PAMGuard module. Core modules which are built into the main PAMGuard code and Plugin modules which are distributed separately. This page tells you how to prepare a Plugin modules for PAMGuard.
Before reading this page, make sure you’ve read up on how to develop a core module.
Setting up a PAMGuard Plugin
The best way to create a PAMGuard, especially if it relies on external dependencies, is to set up a Java Maven project.
Using Eclipse IDE set up PAMGuard as a project in your workspace. Then create a separate Maven project in the same workspace. Right click on the Maven project, select Properties and in the Java Build Path section, select the Projects tab. Click on Add and select the PAMGuard project to add it as a dependency.
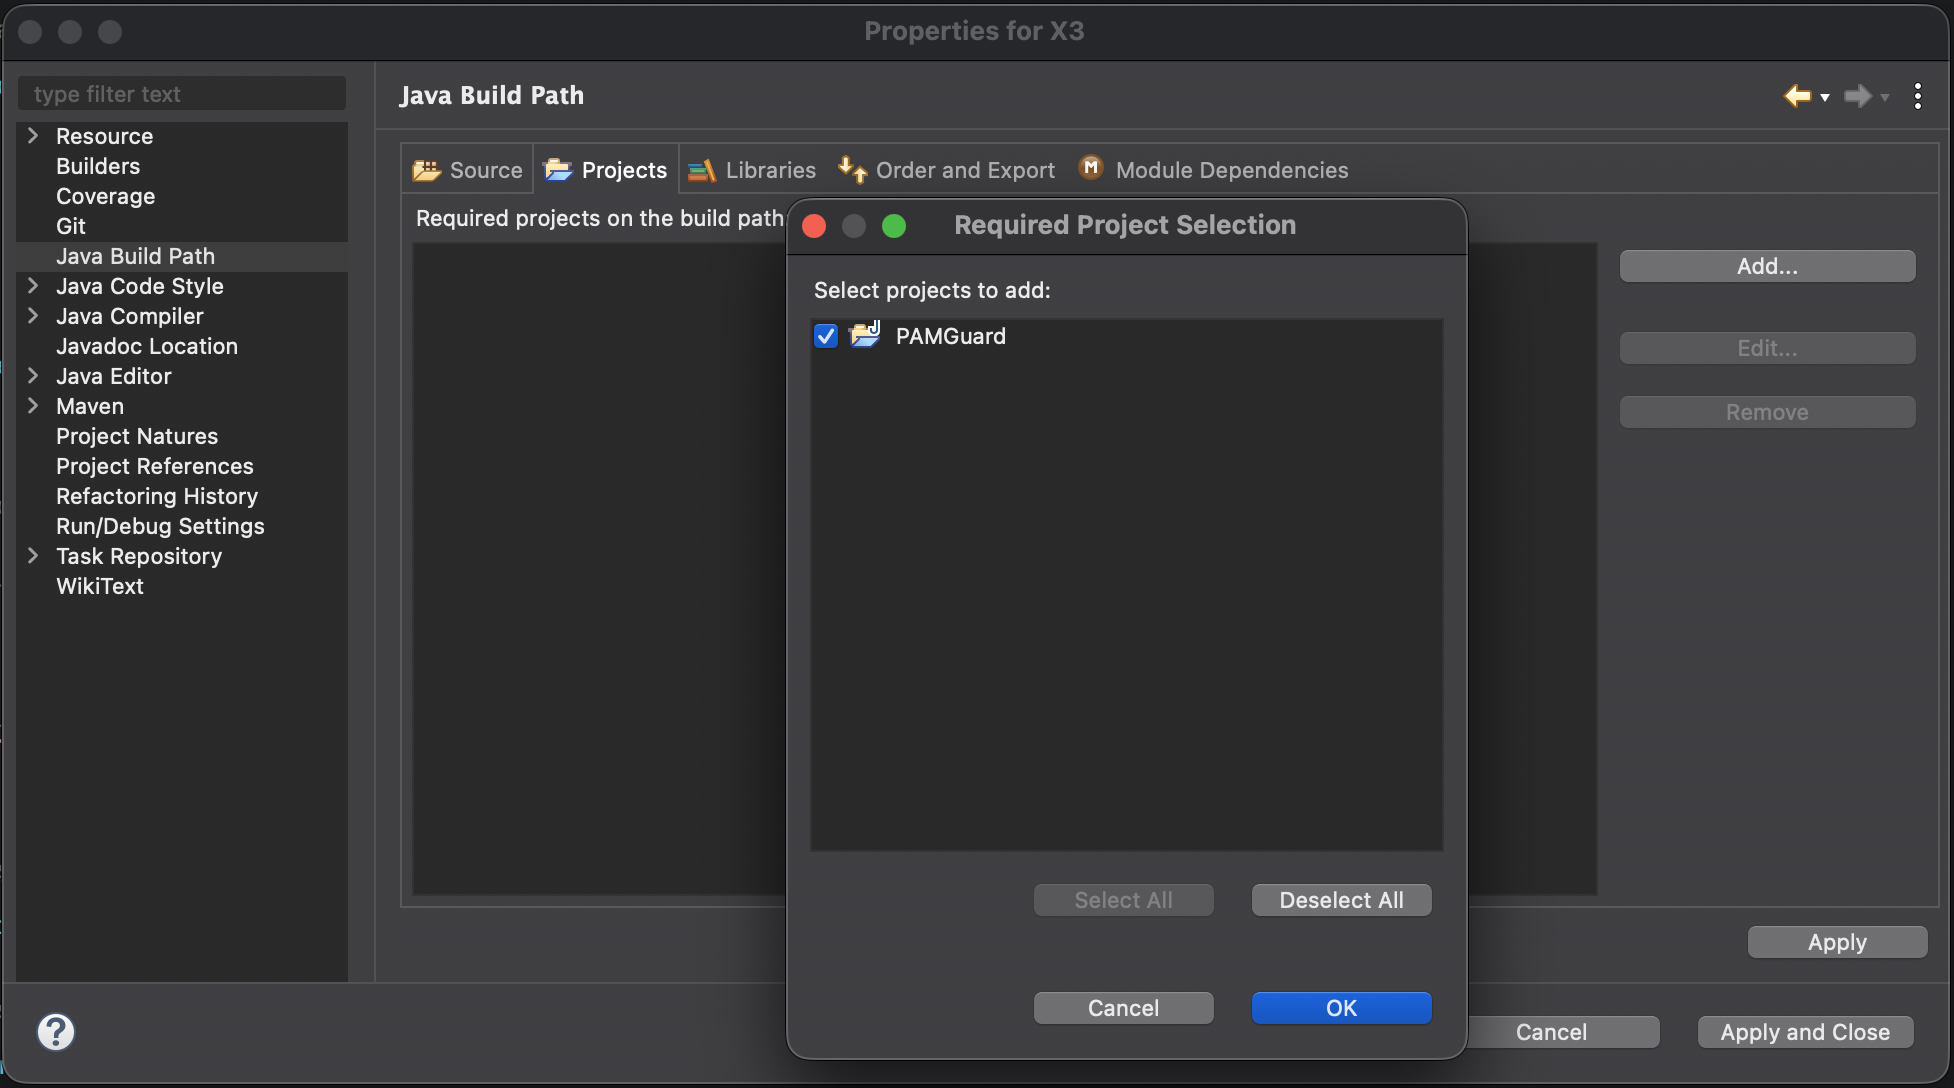
Add PAMGuard to the plugin project’s classpath
Now your plugin project will know all the classes in PAMGuard and you can start developing your plugin module. There are multiple types of plugins and each has an example project which you can use as a starting point.
- To develop a standard PAMGuard module refer to the Detector for the Scottish Wild Haggis project.
- To develop a plugin for the SoundAcquisition module (e.g. to implement new type of sound card) refer to the Windows Sound project as an example.
- To develop a plugin for the AnalogSensor module (e.g. to implement new type of analog sensor) refer to the Dummy Analog Device plugin project.
Note that in all these plugins you must duplicate a PAMGuard class in your plugin project. For example, in a standard module class you must create PamModel class with the same package name as in PAMGuard. Copy the PamModel class from PAMGuard and then add your new module in the plugin version of your PamModel class. When you run your project, the PamModel class from your plugin project will be used instead of the PAMGuard version and your plugin will appear as a module.
To run the plugin from Eclipse simply run create a Run Configuration that launches the PAMGuard main class (pamguard.Pamguard). Ensure that the plugin project is the selected in the Project: field. When PAMGuard starts it will find the plugin classes in the classpath and load them as if they were part of the core PAMGuard code.
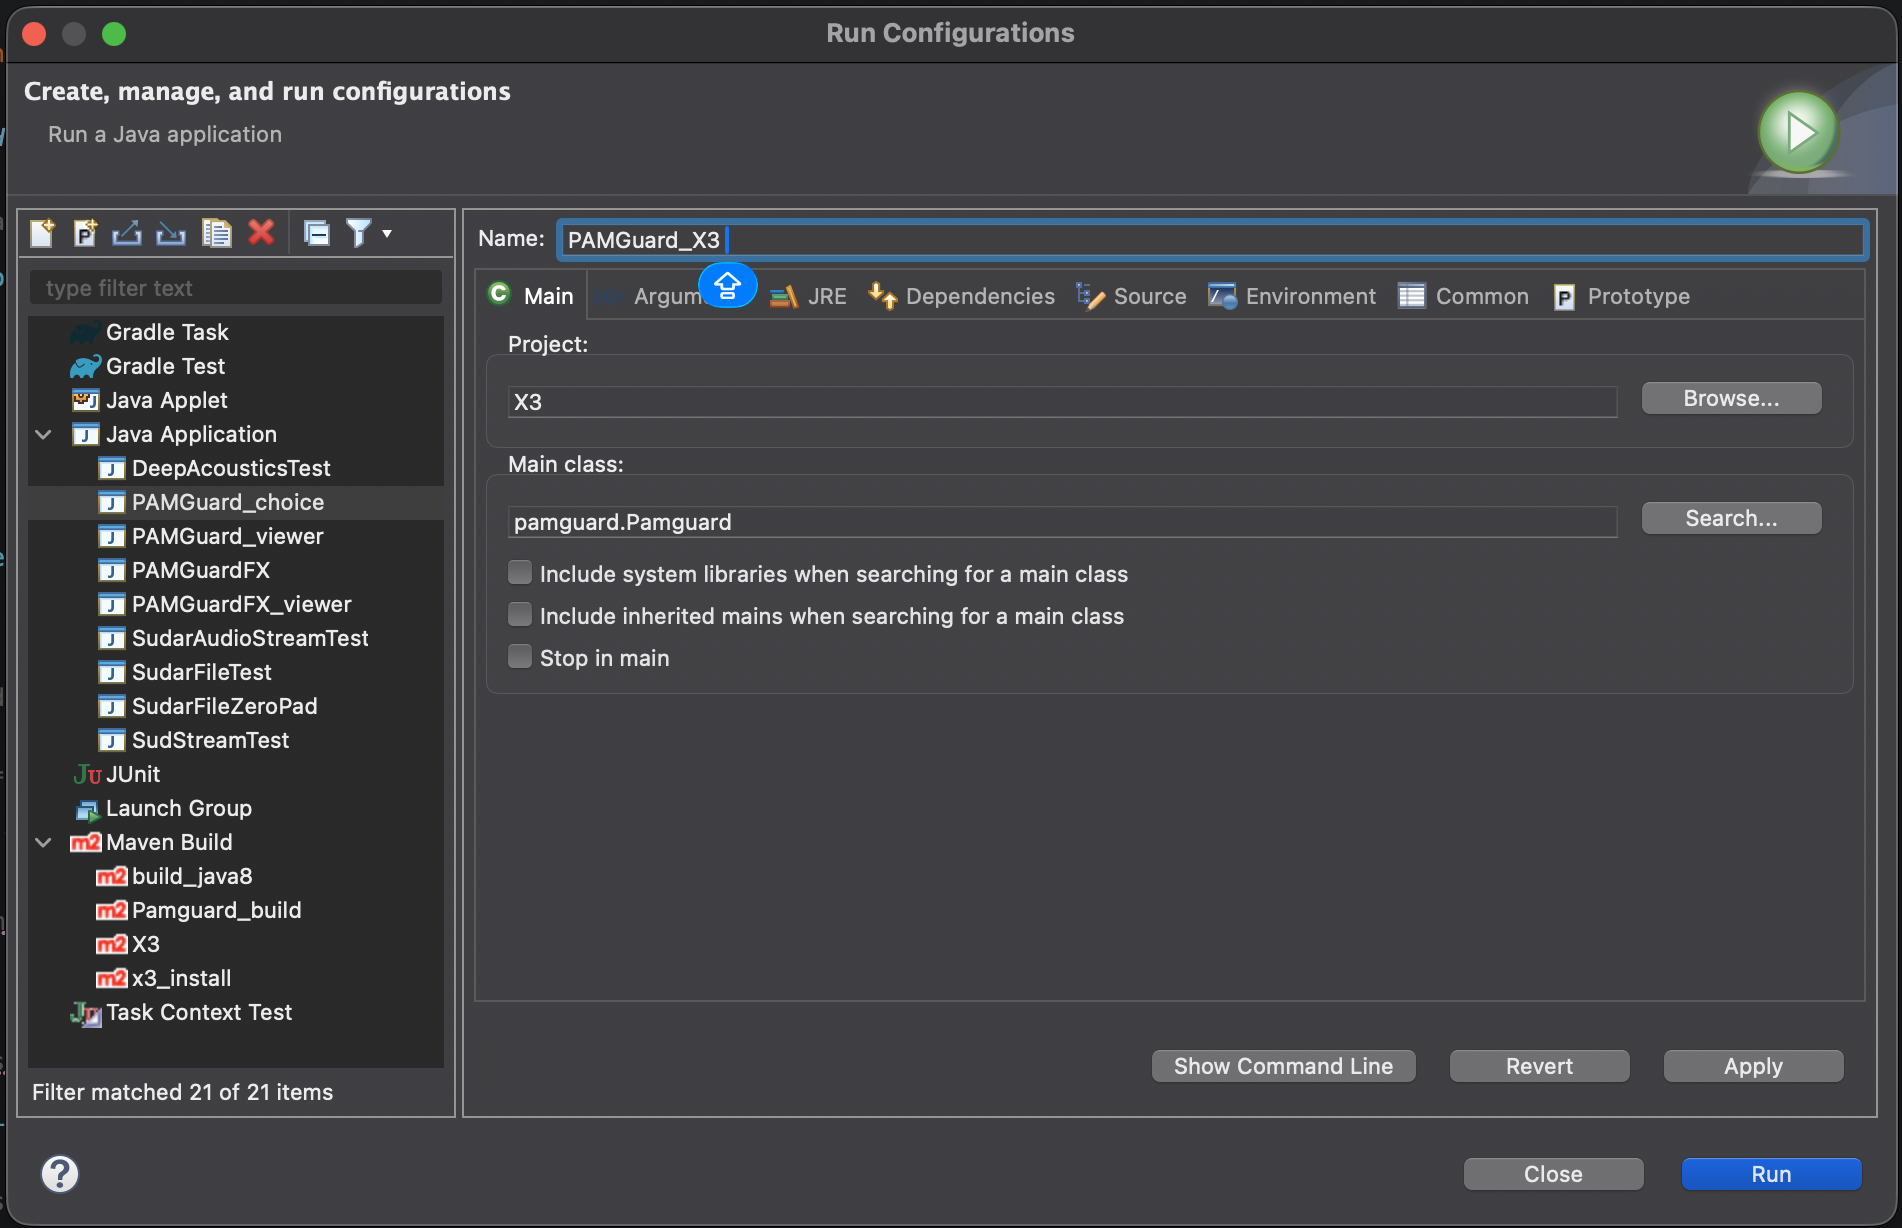 Running a plugin project (in this called X3) from Eclipse.
Building a plugin
Prior to building, you must ensure that your project implements the correct plugin interface e.g. PamModel.PamPluginInterface (for standard plug-in modules) or Acquisition.DaqSystemInterface (for data acquisition modules such as sound cards, file streams, etc.).
Override all of the Interface’s inherited methods, returning appropriate values as specified in the Javadoc comments. Create a String object to hold the jar file name. This parameter does not need to be initialized to anything specific; the value will be set by PAMGuard via the inherited setter method. The code could be as simple as
String jarFile;
@Override public void setJarFile(String jarFile) {
  this.jarFile = jarFile;
}
If you have external dependencies, you will need to build as a Maven project. Maven does not consider Eclipse build settings and so the build will fail unless you add PAMGuard as dependency. In your pom.xml add PAMGuard as a dependency as follows.
<dependency>
    <groupId>org.pamguard</groupId>
    <artifactId>pamguard</artifactId>
    <version>2.02.18</version>
    <scope>provided</scope>
</dependency>
Run mvn clean install for your PAMGuard project (not the plugin) to make sure PAMGuard is added to your local Maven repository. Maven will then build the jar. It’s very important to keep <scope>provided</scope> as this prevents the entire PAMGuard source code being added to the jar file. mvn clean package run from your plugin project will then build the plugin.
It is also important to exclude any of the duplicate classes from your build that have been used to run the Plugin. For example, if building a standard module, ensure the PamModel class is excluded from the build.
<plugin>
  <artifactId>maven-compiler-plugin</artifactId>
  <version>3.13.0</version>
  <configuration>
    <release>21</release>
    <excludes>
      <exclude>**/PamModel/PamModel.java</exclude>
  </excludes>
  </configuration>
</plugin>
Note that sometimes Eclipse can get confused between the workspace PAMGuard and Maven dependency so it’s best to keep the Maven dependency commented out until you are ready to build the jar.
Finally, if you have external dependencies, you will need to ensure that these are included in the jar file. This can be done using the Maven Shade plugin. Add the following to your pom.xml file.
<!--There is an issue with PAMGuard and module.info files when we package up dependencies with the POM - have to use
                the shade plugin to deal with this -->
<plugin>
    <groupId>org.apache.maven.plugins</groupId>
    <artifactId>maven-shade-plugin</artifactId>
    <version>3.6.1</version>
    <executions>
        <execution>
            <phase>package</phase>
            <goals>
                <goal>shade</goal>
            </goals>
            <configuration>
                <transformers>
                    <transformer
                        implementation="org.apache.maven.plugins.shade.resource.ServicesResourceTransformer" />

                    <transformer
                        implementation="org.apache.maven.plugins.shade.resource.ManifestResourceTransformer">
                        <manifestEntries>
                            <Multi-Release>false</Multi-Release>
                        </manifestEntries>
                    </transformer>
                </transformers>

                <filters>
                    <filter>
                        <artifact>*:*</artifact>
                        <excludes>
                            <exclude>module-info.class</exclude>
                            <exclude>**/analoginput/AnalogDevicesManager.java</exclude>
                            <exclude>
                                META-INF/versions/**/module-info.class</exclude>
                            <exclude>META-INF/*.SF</exclude>
                            <exclude>META-INF/*.DSA</exclude>
                            <exclude>META-INF/*.RSA</exclude>
                        </excludes>
                    </filter>
                </filters>
            </configuration>
        </execution>
    </executions>
</plugin>
Help files
It is strongly recommended that help files be included with the plug-in. PAMGuard uses Oracle’s JavaHelp 2.0 system (complete details can be found here). Each page in the help file is an HTML document. Create individual HTML pages (with links and images) to describe the setup and operation of the plug-in, and save all files in the same package folder that your java program is in. Once the pages are completed, create the helpset and support files (map, TOC, index, etc.). Programs like jhelpdev can greatly simplify the process of creating these files. Again, see the example projects to see how to link to other pages within the main PAMGuard help system and how to create links to your help pages from within your code (e.g. for an example having a Help button in a dialog see HaggisParametersDialog.java line 73).
Testing the Plugin jar file
To test the jar file, move it to the plugins subfolder in the PAMGuard installation folder. If there is no plugins folder, create one. When PAMGuard is started, it should find the jar file and use the information in the interface class to dynamically load the code. Remember to rename/delete the package in the PAMGuard code first, to ensure that you are really testing the jar file contents and not the original code.
Tips and Notes
Even if the plugin is intended as an External module, it can be more straightforward to develop it as a Core module. In other words, create a new package in the PAMGuard code base to hold all of the new classes, and add a reference to the package classes in PamModel. This way, dependencies do not need to be explicitly managed and debugging is simplified. All development should be done within the new package, and the core PAMGuard classes should not be changed (if modifications are necessary, please contact the PAMGuard development team first).
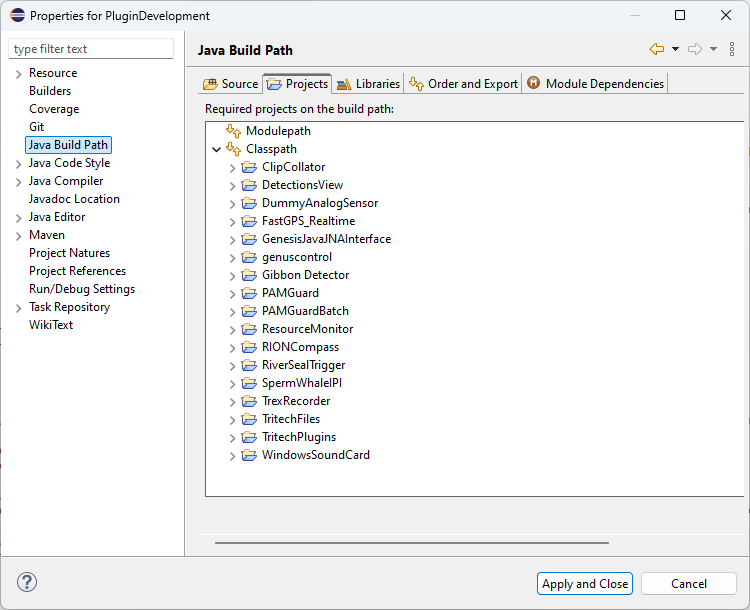
Another method, which is useful if you’re working on many different plugins, is to have each as a separate project within the same Eclipse workspace, then make a plugin development project which has nothing but a copy of PamModel.java thats modified to include all of your different plugins. See here for an example. At around line 1200 in the function PamModel.listPlugins I’ve added 14 different plugins I’m either working on or want to use from within Eclipse.
        pluginList.add(new CollatorPlugin());
        pluginList.add(new DVPlugin());
        pluginList.add(new DummyAnalogPlugin());
        pluginList.add(new GibbonPlugin());
        pluginList.add(new TritechDaqPlugin());
        pluginList.add(new TritechDetectPlugin());
        pluginList.add(new resourceMonitorPlugin());
        pluginList.add(new RiverTriggerPlugin());
        pluginList.add(new SpermIpiPlugin());
        pluginList.add(new TrexPlugin());
        pluginList.add(new WinSoundPlugin());
        pluginList.add(new BatchJobPlugin());
        pluginList.add(new GenusPlugin());
        pluginList.add(new RIONPlugin());
To make it work, each project is included in the Java Build path for my plugin development project.
If plug-in development has been done in the core PAMGuard code and then exported to a jar, the *.class files may still exist in the PAMGuard project’s bin subfolder (even if the original package has been deleted). If testing the plug-in jar in the IDE, first look through the bin subfolder and delete any plug-in* .class files that are stored. If PAMGuard finds the classes in both the bin folder and the jar file, it is unclear which would get loaded at runtime. The class files are replaced in the bin folder every time a build is completed. Also, remember to remove references to the new module from the PamModel class, as this will be taken care of by the jar file.
To have the help files added to an existing category (i.e., Classifiers, Detectors, etc.) in the PAMGUARDhelp table of contents, the top-level tag text attribute in the plug-in’s TOC XML file must match the category name exactly. Some category names have a space character at the end. If in doubt, check the PAMGUARDTOC.XML file found in src/help for a list of the TOC entries. If the top-level tag text attribute in the plug-in’s TOC XML file does not match any of the category names in the table of contents, the item is simply appended to the bottom of the list. To match the existing table of contents look-and-feel, each tag in the plug-in’s TOC XML file should have image=”topic” added as an attribute. Copy the image.gif file found in src/help to the plug-in package folder. Ensure the line is in the plug-in’s map.jhm file.
Specify the name of the helpset file in the plug-in interface class. Look through the interface Javadoc documentation for the correct format to use.
Follow these steps to bundle all files together into a single JAR, ready for distribution. Note the following are specific to the Eclipse IDE. Other IDEs will have similar functionality:
- Right-click on the project name in the Package Explorer view and select Export.
- In the Export window, click on the Java folder and highlight JAR file. Hit Next.
- In the window on the left, make sure the package and all necessary subfolders are selected to export (sometimes subfolders created by JavaHelp - such as JavaHelpSearch – are not included in the export list by default).
- Click on the box beside “Export generated class files and resources” and “Export Java source files and resources”.
- Enter the name of the exported JAR file in the text box under “Select the export destination”. You can click on the box beside “Compress the contents of the JAR file”, though this is optional.
- The default values for the remainder of the windows can be used. Hit Finish to export the package to the location specified.
To test the JAR file, move it to the plugins subfolder in the PAMGuard installation folder. If there is no plugins folder, create one. When PAMGuard is started, it should find the JAR file and use the information in the interface class to dynamically load the code. Remember to rename/delete the package in the PAMGuard code first, to ensure that you are really testing the JAR file contents and not the original code.
Final note: if plug-in development has been done in the core PAMGuard code and then exported to a JAR, the *.class files may still exist in the PAMGuard project’s bin subfolder (even if the original package has been deleted). If testing the plug-in JAR in the IDE, first look through the bin subfolder and delete any plug-in* .class files that are stored. If PAMGuard finds the classes in both the bin folder and the JAR file, it is unclear which would get loaded at runtime. The class files are replaced in the bin folder every time a build is completed. Also, remember to remove references to the new module from the PamModel class, as this will be taken care of by the JAR file.